In this manual we will tell you step by step what you need to do to put your campsite online at CamperNet.eu.
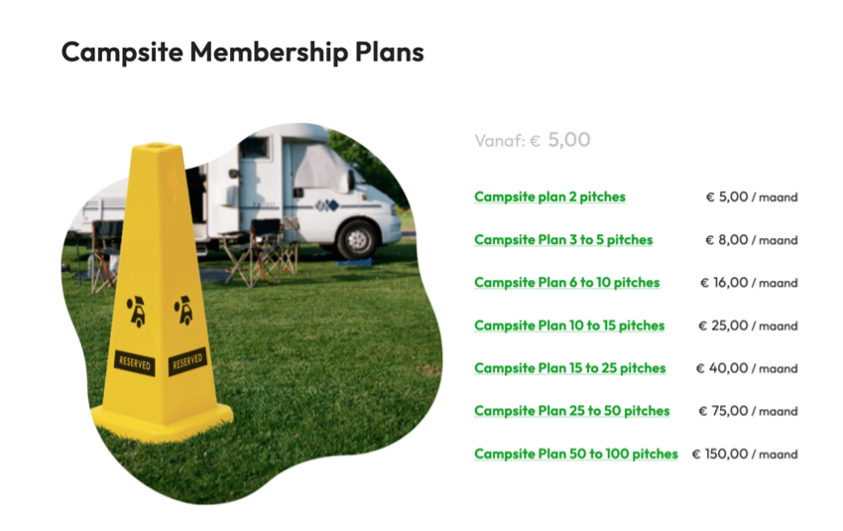
The choice and purchase of your subscription #
Choose the right plan
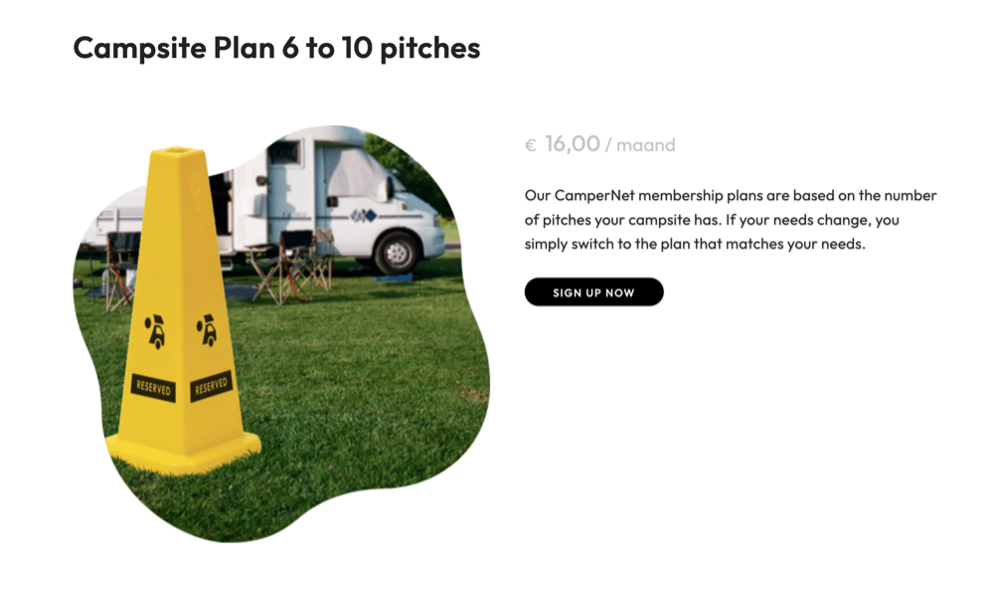
Go to https://campernet.eu/product/campsite-membership-plans/ and choose the plan that suits you best. If you have 8 pitches, choose the ‘Campsite plan 6 to 10 pitches’. If you want to scale up or down later, you can always do so.
On the next page, choose ‘Sign up Now’
You will now arrive at the order page.
First enter your company details on this page.
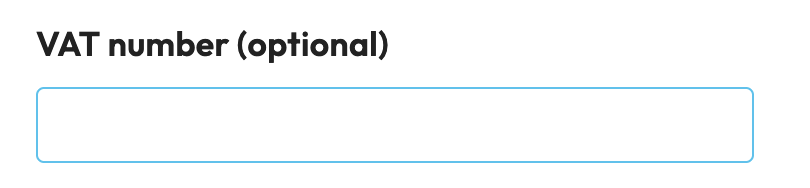
CamperNet is based in Ireland. If you’re not based in Ireland and have a VAT number, be sure to fill it in. We will then not charge VAT on the invoice (VAT reverse charge). Enter the number including the country code like NL or IE.
URL Choice #
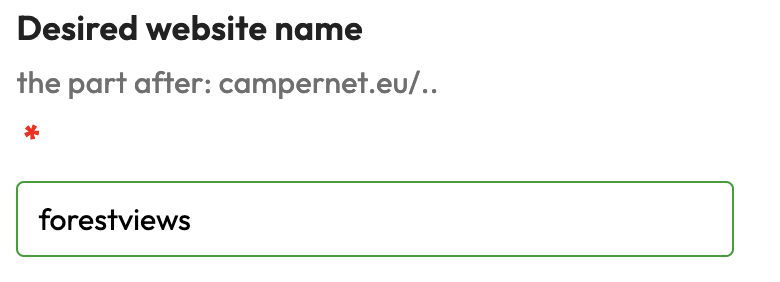
When ordering, you also choose the URL of your website. The URL always starts with https://campernet.eu/ , the part after that you must choose here. It is most convenient if the name of your campsite is included.
In the example below we choose ‘forestviews’. The entire URL on which your campsite can be found will then be https://campernet.eu/forestviews
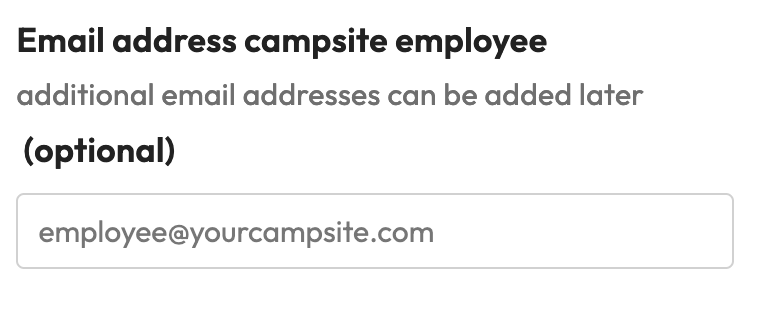
Additional email address of camping employee. #
To log in to your website, you will use the email address you used here to take out the subscription. You can add an extra email address under ‘Campsite employee email address’. A campsite employee will be able to view and manage bookings, but won’t be able to change any system settings.
Pay #
Once you have filled in everything, scroll down, choose your payment method and pay.

If the payment is successful, you will be taken to the confirmation page.
You will also immediately receive an email confirming your order and an email stating that an account has been created on CamperNet.eu. If you log in there you can view and change your data, among other things. You will also find your invoices here and you can change your subscription.
After we have done a final check and approved your subscription, the following things are done automatically:
- Your domain/package (campernet.eu/yourcampsite ) is created and prepared for use. When everything is ready, you will receive a message, you can log in and you can start setting up your package, your campsite online.
- An account will be created at https://support.rentalnet.eu/ You will find documentation about CamperNet.eu here and can log in for support. To log in, use the same email address as you used for the CamperNet subscription . You will need to request a new password. Click on https://support.rentalnet.eu/wp-login.php?action=lostpassword , enter your email address and press ‘Get a new password’. You will then receive an email with which you can set a new password
Set up your package #
Before you really get started, it is useful to collect the following things:
- Digital logo of your company
- List of amenities
- Pricing information
- Photos of your campsite, pitches and surroundings
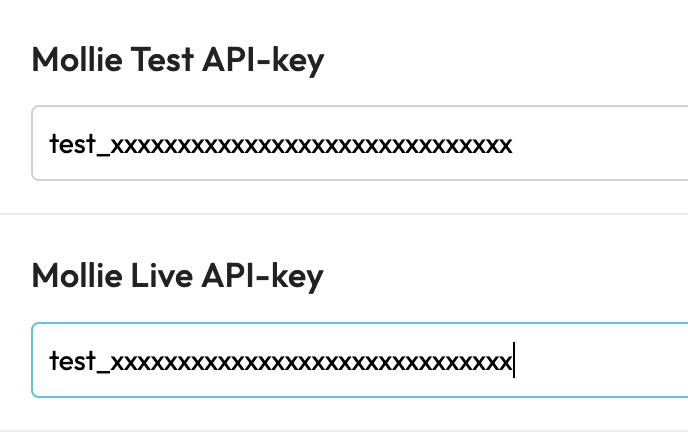
Mollie Keys to process payments on your website . You can read how to open a Mollie account here . Once you have completed the first steps, you can already cut and paste the keys . The keys you need are:
- Live API key
- Test API key
NB! If you don’t have a Mollie account yet, you can get started. anyway. The keys can always be entered later.
Are you wondering why you need a Mollie account? Then read this article .
Enter your details #
When you log in to your website (at campernet.eu/yourwebsite/login )you will see that it already has photos and information. That is demo information that you are going to replace.
If you are logged in, you will see ‘Settings’ right in the menu. Click on this and you will be taken to the page where we will set everything up for use.

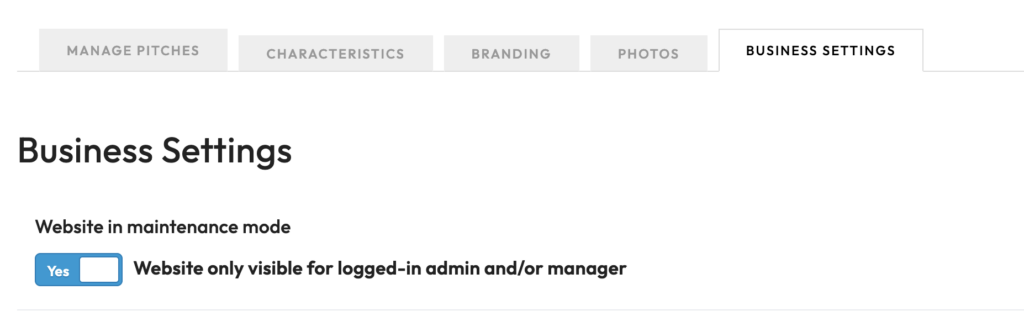
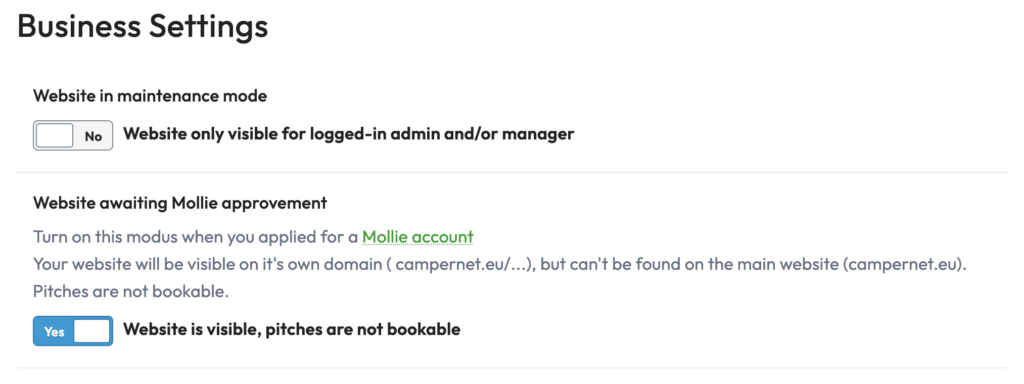
Business Settings #
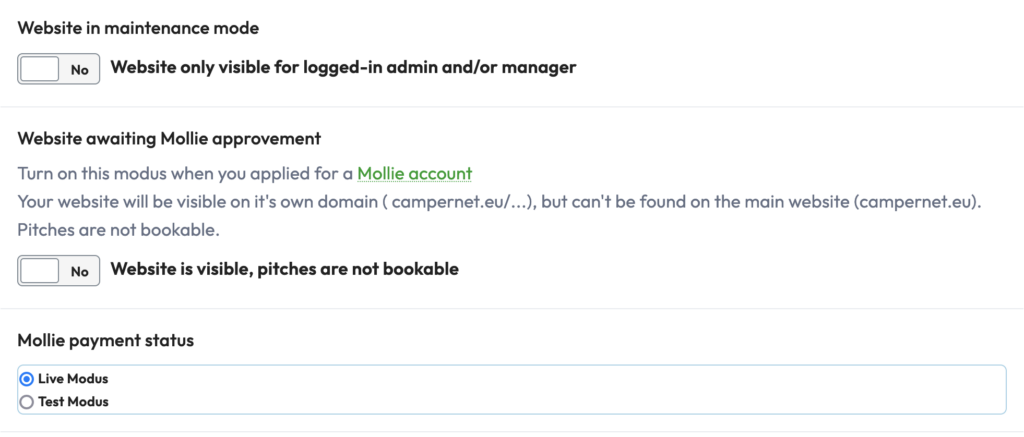
On the page you will see 4 tabs. First select ‘ Business settings’. Your site should be in Maintenance mode. Your site is not yet visible to regular visitors and cannot yet be found via the main CamperNet.eu site.
Leave the next button off for now. Once your site has been set up, set this button to yes and go to Mollie to register the site there as well . Do you already have the Mollie Test key and Live key, key then enter them in the appropriate fields.

Now scroll further down and fill in as much information as possible. NB! In order to accept payments you must provide a full address and chamber of commerce number (Business registration number ) to be filled in.
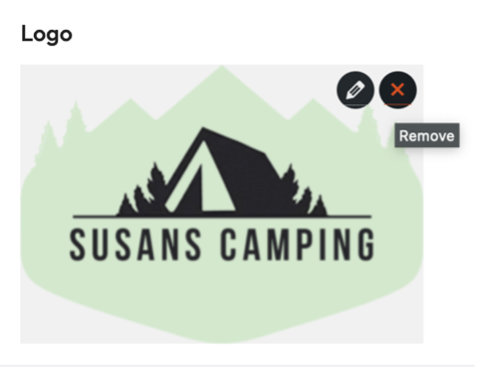
Logo #
When you get to the logo, move your mouse over the image. Then press the red cross to delete the current logo.
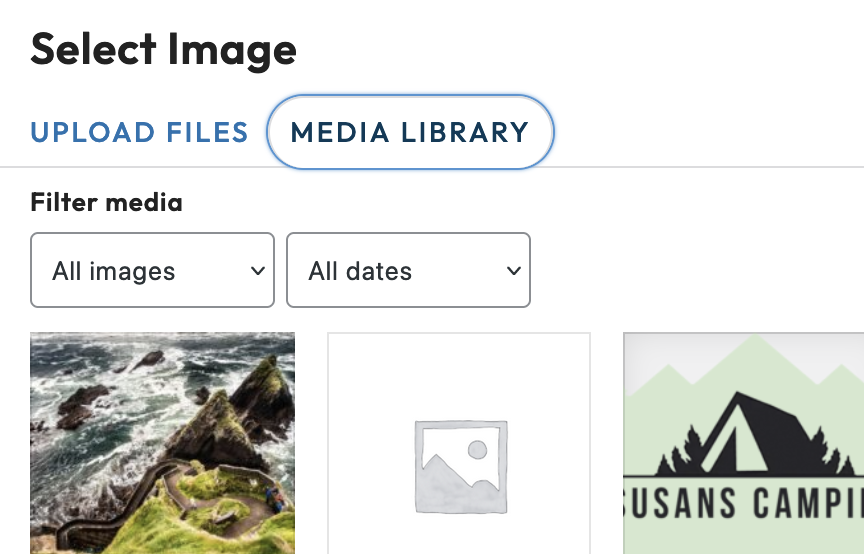
Then click on ‘Add image’ and you will arrive at a screen where you can choose existing photos/pictures, but also upload a new logo.

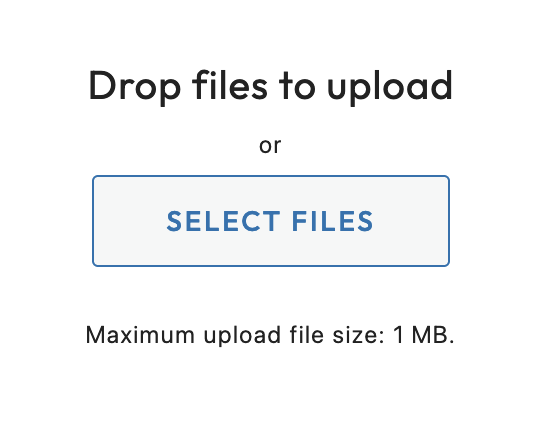
You can now upload the new logo by clicking on ‘Upload files’ on the left.
Then press the ‘Upload Files’ button and you can upload a logo, with a maximum size of 1 MB (but preferably smaller).
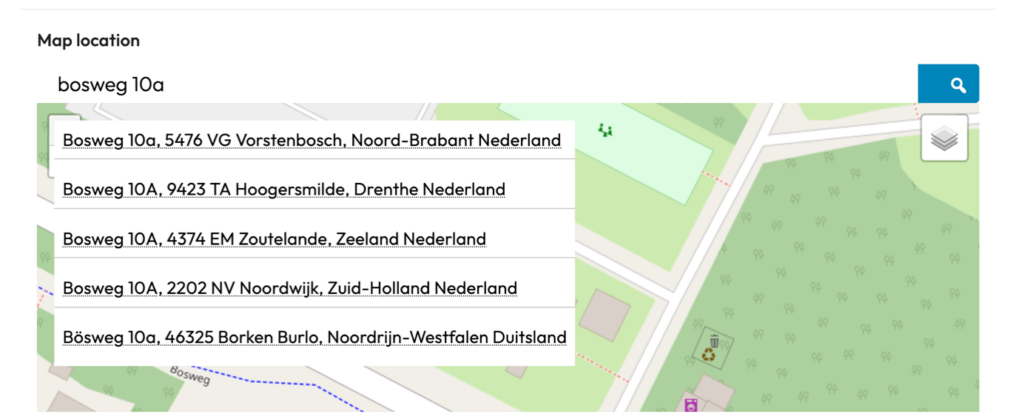
Map location #
Enter the address of the campsite in the search bar and press the blue magnifying glass. Then choose the correct address from the list.
If the correct address is not listed, try writing the address in a different way and search again.
Conditions #
Paste the general terms and conditions that your company applies in this box. Visitors agree to this when booking a place.
Save settings #
When you are done, press ‘Save settings’ and the settings of this page are saved.
Have you already filled in some information, will you stop for a moment, or would you like to look something up? Then also press this button in the meantime. This way you don’t have to start over when you move on.

Photos #
Now go to the next tab and upload photos of your campsite.

You can upload 3 types of photos on this page:
- General photos of your campsite
- General photos of the pitches on at your campste. You can also upload photos per individual pitch later. If you don’t, the system will use photos you uploaded here.
- Photos from the area, for example beautiful pictures of the view, forest, beach or anything that makes your region special.
When you have finished uploading, press ‘Save photos’.

Branding #
Now go to the ‘Branding’ tab

On the Branding page you upload a beautiful photo that we use at the top of your page, in the cloud. You also enter the following texts here:
Title
- in Dutch and English
- Note: make the title catchy and not too long
Introduction
- Short catchy text in Dutch and English that briefly describes your campsite
Tip: if you are not very good at writing texts, use the help of Google translate and/or Chat GPT .
When using ChatGPT we suggest using the following command:
- Write a short introductory text of approximately 150 words in Dutch and English for [company name]. We are located in [e.g. the heart of Drenthe ] and offer [e.g. luxury camper pitches on the edge of the forest]
Then issue the following command:
- Now write a catchy title of maximum 8 words in Dutch and English
Check whether the texts are correct for you, adjust them if necessary and paste them in the boxes on the website. If you want something completely different, ask your question again with a different wording.
When you are done, press the ‘Save branding settings’ button again.

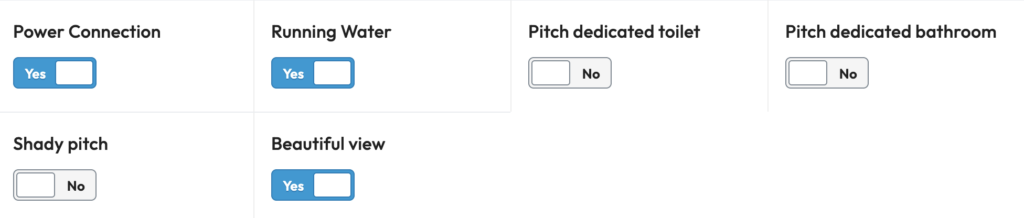
Characteristics #
To enter the characteristics of your campsite, first click on ‘characteristics’.

We will explain a number of features in more detail below.
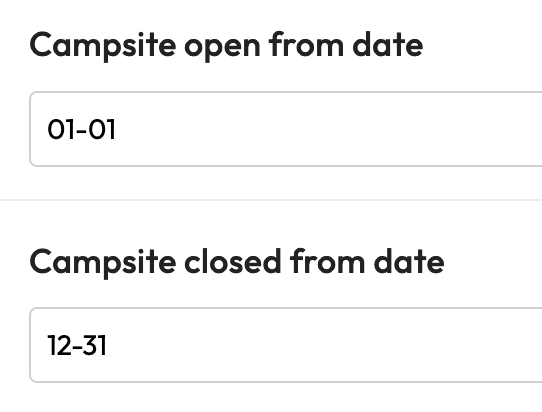
Campsite open / closed from #
The campsite is open all year round by default. For example, if you are closed from November to March, click on the date boxes and select the date of March 1 in ‘Camper site open from date’ and the date of November 1 in ‘Camper site closed from date’.
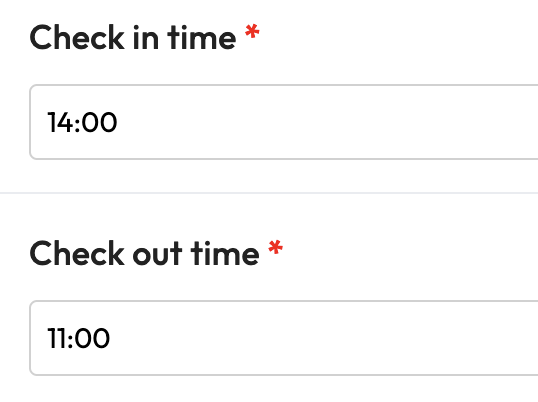
Check in time / Check out time #
Here you indicate from what time campers can arrive and check in, and before what time they have to leave
Self check-in #
Do you have a (partially) unmanaged campsite and do you want to give your guests the opportunity to check in and out themselves? Then set this button to Yes. Your guests will then receive a link with the booking confirmation with which they can check in on the day of arrival and a link with which they can check out later.
Of course you can also turn this on if you are there and just find it easy.

Prices extras, to be paid directly when booking #
When booking, the price per night per pitch is based on 2 people and a campervan. The following items can be added directly when booking. You can indicate the prices here:
- Extra adult, indicate under ‘Age adult price’ when you consider someone to be an adult.
- Additional child or teenager (not adult)
- Pet per night
- Dogs and other pets per night
- Power connection per night
Prices for extras informative (cannot be paid directly when booking) #
You can also indicate whether a number of facilities are available and whether they have to be paid for or not. Any payment will be made during the stay.
This concerns the following facilities:
- Washing machine
- Discharge chemical toilet
- Discharge of waste water
- WiFi
- Toilet
- Drinking water
Once you have gone through everything, press the ‘Save characteristics’ button.

Create and manage pitches #
Now we are going to create pitches. To do this, click on the ‘Manage pitches’ tab

You will now see a list of available demo pitches. We will remove this first. Press the ‘delete’ button with the trash can in each row until there are no more pitches in the overview.

Now press the ‘Add camper pitch’ button. You will then enter a form with which you can add a pitch.

Pitch number or name #
Enter the number or name of the pitch here. This should be a unique name that will help you identify this pitch later
Pitch type #
Enter a type for the campsite here. Think of ‘Standard’, ‘Luxury’ or, for example, ‘Waterside’. You can decide for yourself what is useful for you.
Cost per night #
The basic price per night for this pitch, for a maximum of 2 people staying in the camper.
Pitch photos #
Here you can add photos of this specific pitch. If you do not add photos, the system will show the photos you previously added under the ‘Photos’ tab.
Pitch description #
Here you can give a brief description of this pitch. Consider things like:
- Beautiful, spacious place located on the water side, close to…, etc.
Features block #
Finally, there is a features block with switches that you can turn on and off. These features are specifically for this pitch.
The features are displayed as follows when a customer wants to book (green icons):

Save #
Finally, press ‘Save pitch’ and the first pitch to be booked has been created.
Repeat this process for all the pitches you want to list.

Go live #
Before you go live, you must have your site approved by Mollie for accepting payments.
Business settings #
To do this, first go back to the ‘Business settings’ tab and remove the website from ‘maintenance mode’ and set ‘Website awaiting Mollie approval ‘ to ‘Yes’. Then scroll down and save the settings.
Mollie #
Now log in to Mollie again and go through all the steps that you have not yet completed to register your website.
In step 5 do the following:
In the left column, go to ‘Organisation Settings’ > ‘Profiles’

Then click on ‘Create profile’
And fill in the fields as good as possible.
Important!
Fill out the URL of your site on CamperNet.eu under website . Check this by pasting this URL into your browser and seeing if it goes directly to your site.
Use the attached screenshot as a basis.
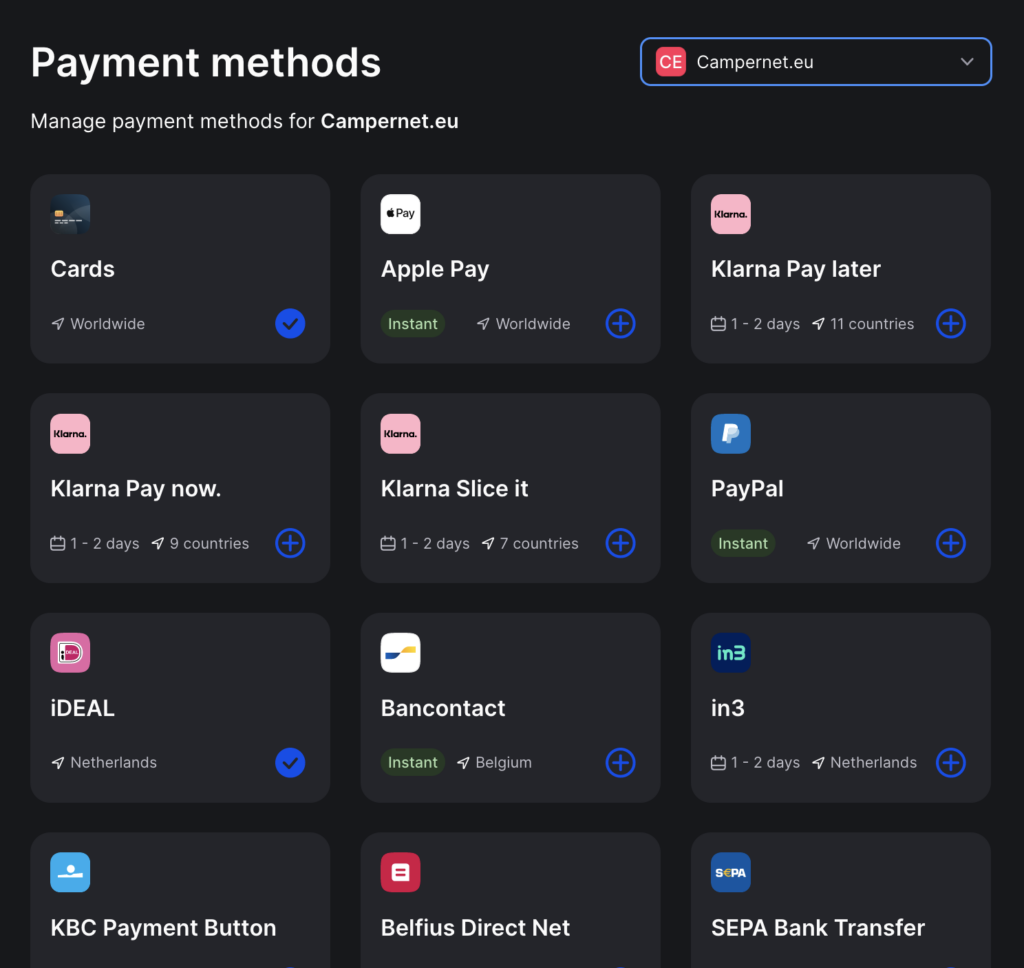
Then go to ‘Payment methods’ and select the payment methods you want to accept.
You should at least activate ‘Credit and debit cards ‘ and furthermore whatever suits you best, like ‘ ideal ‘.
Activate your system after Mollie message #
If your payment methods are approved. You can open your website to accept bookings? NB! If you have requested multiple payment methods, the approvals often do not come at the same time. It is up to you when you open your website.
When you are ready to receive bookings , first return to the ‘Business settings’.
Check API Keys #
Check one last time whether you have entered the API keys for receiving payments. PLEASE NOTE: the attached photo is an example and does not contain your keys !! You can find your keys in your own Mollie dashboard.
Receive bookings #
To receive bookings, set the first two switches to ‘ No’ and set the ‘ Mollie payment status’ to ‘Live Mode’. Scroll down and save.
Your pitches can now be booked and found via the main CamperNet.eu site.
Testing #
Do you want to test first and see how things work? Leave the ‘ Mollie Payment Status’ is set to ‘Test Mode’, and reset the website to ‘Maintenance’ mode.
You can now make bookings yourself (use a different email address) and pay in test mode. If you have Ideal as a payment method choose Ideal. To test with various types of Credit and Debit cards, look up card numbers for testing here. When you have completed a booking, it will appear in the booking overview and on the calendar.


